
This article presents the Starlink installation in Oswego, IL that was successfully completed by ProSat Networks 1-844-799-0258. We offer professional Starlink installation and IT network solutions for commercial businesses, residential homes, RV parks, campgrounds, construction sites, agricultural operations, airplane hangars, mining facilities and long-range, multi-building indoor and outdoor wireless networks across Illinois.
To book your Starlink installation, call us at 1-844-799-0258 or request a quote through our Contact Us form.
🔹Location: Oswego, IL
🔹Property Type: Warehouse
🔹Roof Type: Standing seam metal
🔹Starlink Kit: Standard kit
🔹Mount Solution: Pivot mount
🔹Current Set Up: With IT network infrastructure in place with on-going setup
Our Starlink Installation SMEs received a service request for Starlink installation in Oswego, IL. Our team kick-off the installation process by conducting the following tasks:
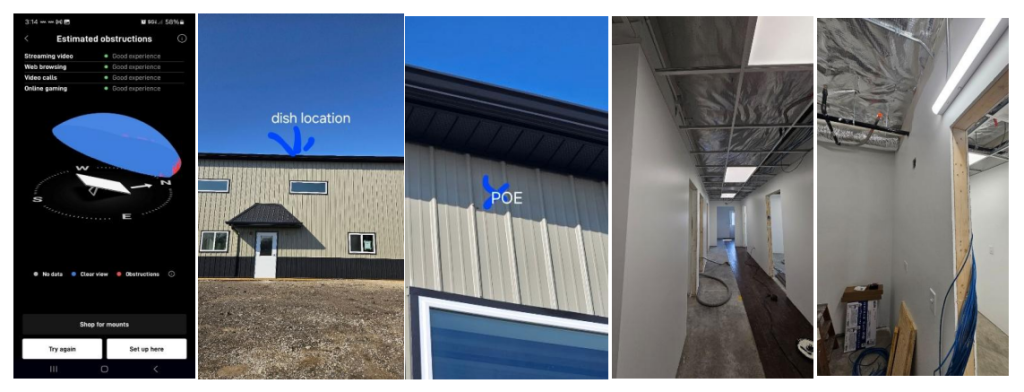
Our team performed an initial offsite assessment to determine the customer’s requirements and the technical feasibility of the location for the Starlink installation. After the assessment, a site survey visit was recommended to:
🔹Determine the optimal location for the Starlink mount and dish installation based on Obstructions test result.
🔹Plan the best cable path, ensuring minimal disruption and obtain client approval.
🔹Determine the floor plan and network layout, if necessary and take onsite photos.
🔹Verify the required equipments, parts and materials needed for successful one-visit installation.
After the site survey visit, our Starlink installer sent the Starlink installation proposal for customer's approval. Once approved and all materials and equipment are available onsite, the installation schedule is coordinated with our professional Starlink installers in Oswego, IL.
Our professional Starlink installer arrived on site as scheduled to perform the following scope of work:
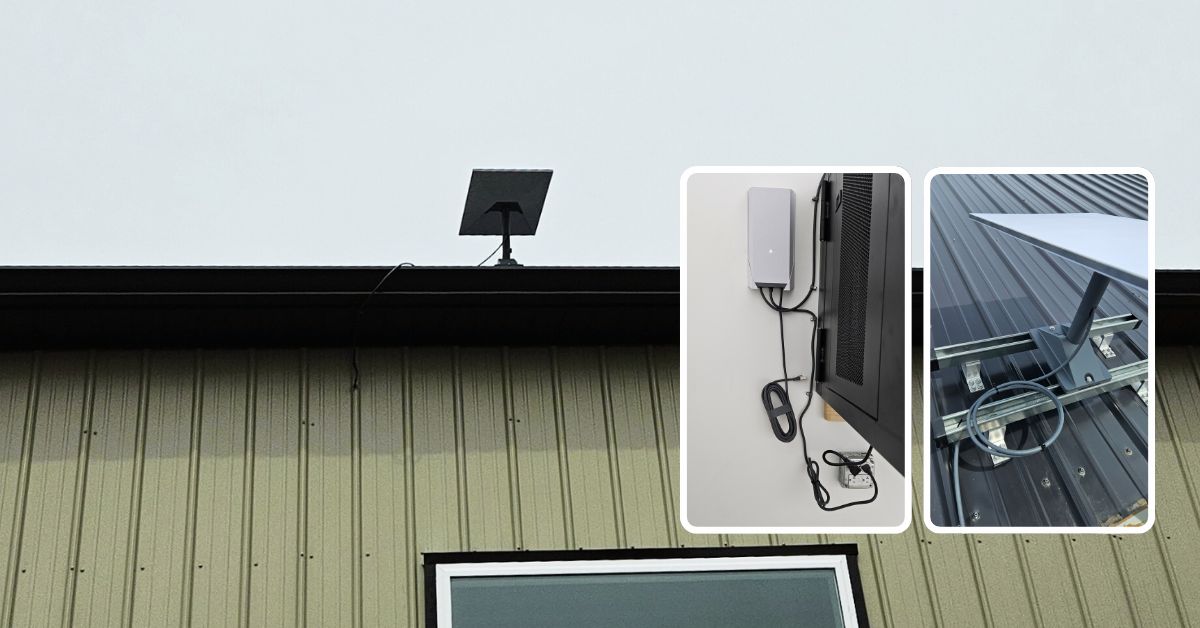
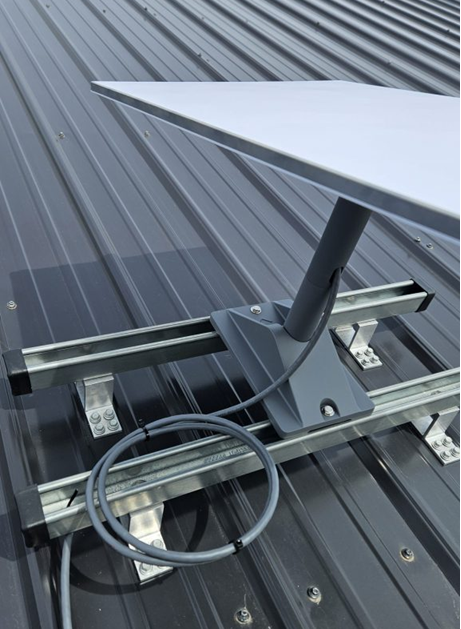
🔹Dish / Antenna Installation: Install the Starlink Enterprise dish using a pivot mount attached to a bracket for secure and stable placement.
🔹Router Setup: Need Starlink Gen3 router or 3rd party router onsite
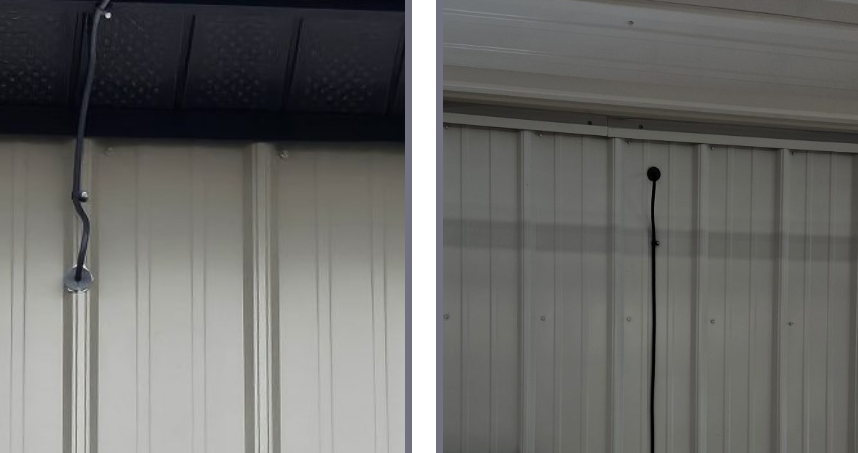
🔹Cable Routing: Run a 50m cable from the antenna to the MDF, sealing and waterproofing any drilled holes, incorporating a drip loop for outdoor vertical cabling, securing cables to prevent tripping hazards, and following verified cable paths.
🔹Power Supply Installation: Mount the power supply within 1.8m (6ft) of the power source, plug in the Starlink, AC, and Ethernet cables, then slide the power supply into the mount and route the Ethernet cable to the Starlink Router or a third-party router if available.
🔹Starlink App: Guide the customer on how to use the Starlink App account.
🔹Starlink Performance Test: Test Starlink connectivity
🔹Installation Photos: Document the installations with photos and close-out notes.
🔹Other equipment needed: Lift, cable routing kit, bracket and router.
The Starlink dish was installed using a pivot mount firmly attached to a metal bracket to ensure stability and proper alignment. The pivot mount allows for precise adjustments, optimizing the dish’s positioning for maximum signal reception. The bracket was securely fastened to the roof surface using bolts and reinforced supports, preventing movement due to wind or wheather.
The Enterprise cable was routed from the dish, entering through a drilled hole sealed with a grommet or weatherproofing material for protection against the elements. The cable is neatly secured on the interior with cable clips, aligning vertically along the metal panel. This setup ensures a clean installation while preventing cable strain and potential damage.
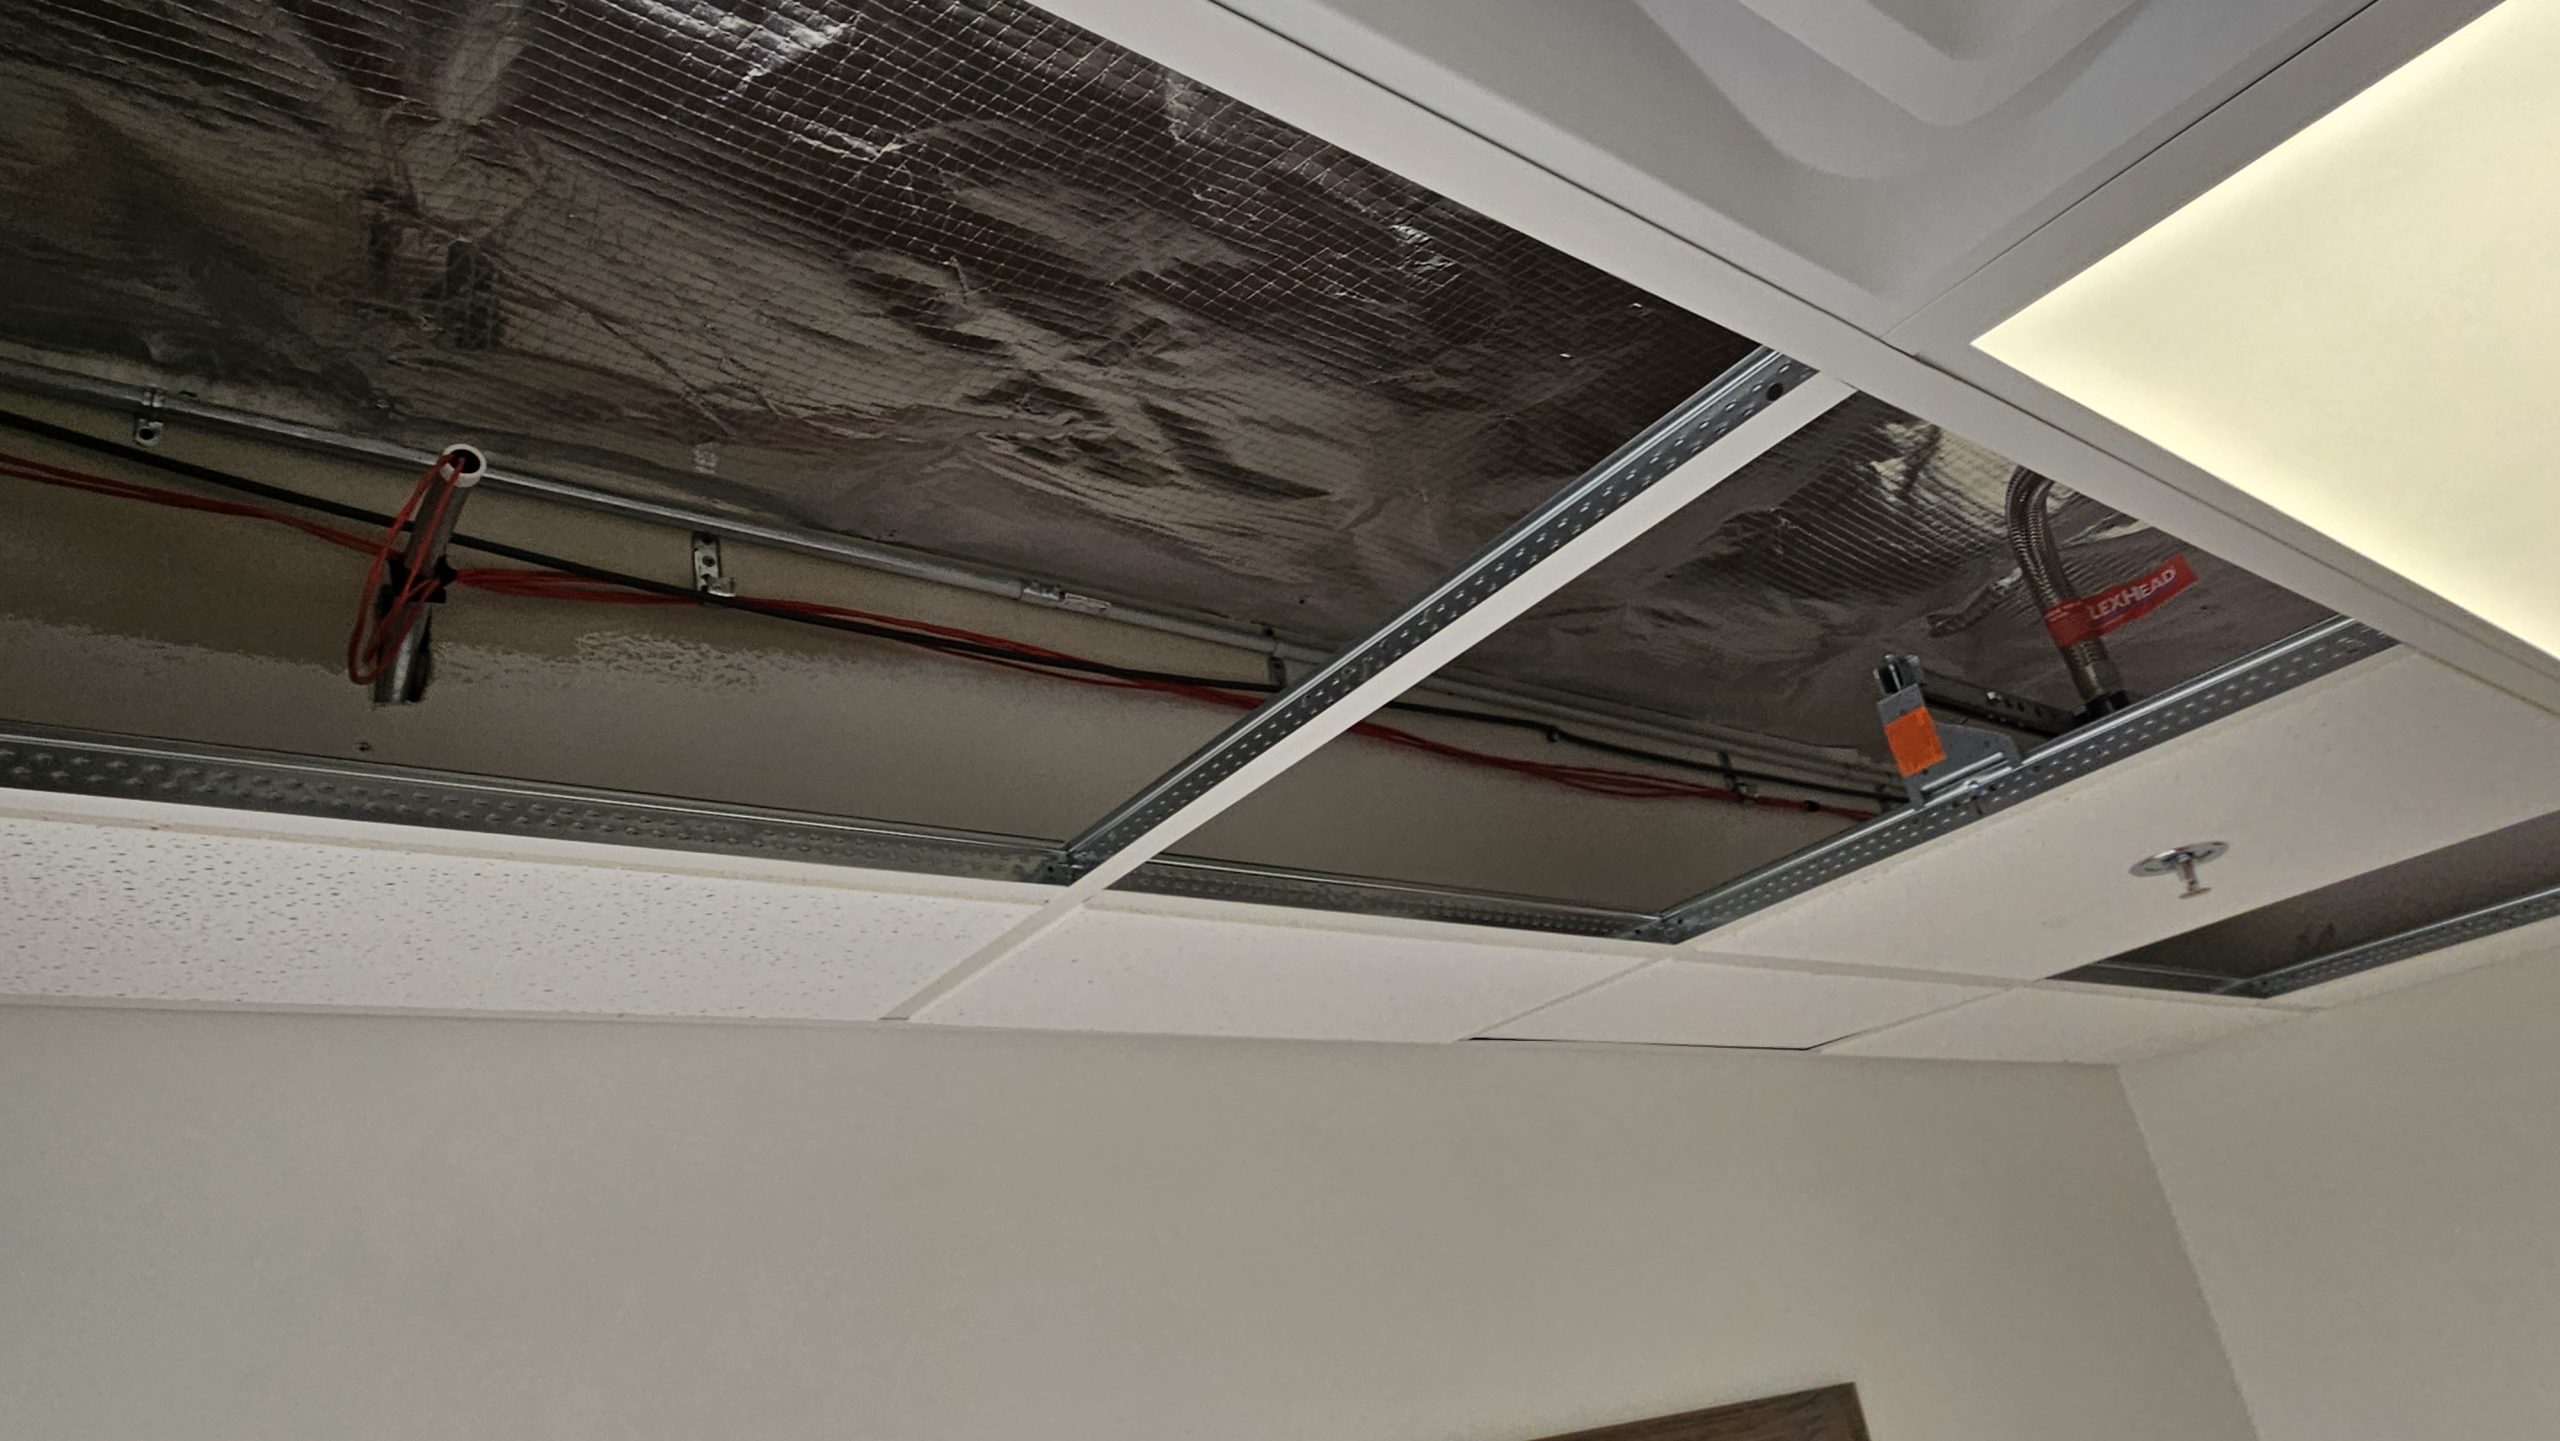
Then, cables were routed securely along the existing metal framework using zip ties or fasteners within the ceiling cavity or above the drop ceiling to the MDF location.
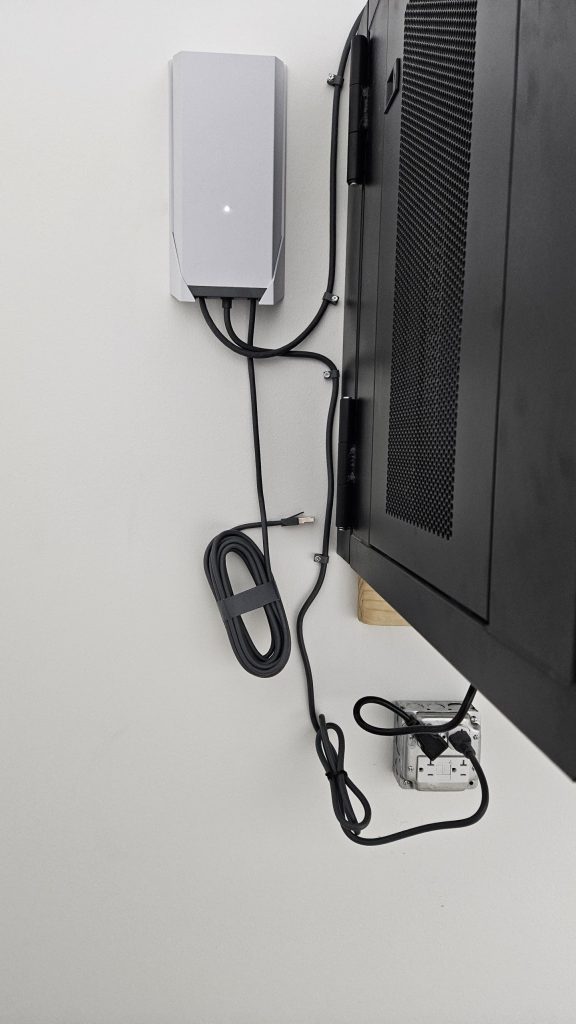
The power supply was wall-mounted, with cables securely routed and fastened along the wall using cable clips. It is plugged into an industrial-grade electrical outlet with a metal junction box, ensuring a robust and safe connection. Excess cable length is neatly coiled and secured with Velcro straps, preventing clutter. The installation follows best practices for structured cabling, maintaining a clean and professional appearance while minimizing cable strain and potential hazards.
After plugging in the power cable and allowing the system to initialize. The Starlink was terminated to the existing network.
Our Starlink installers conducted the Starlink alignment test using the Starlink app to confirm that the dish had a clear, unobstructed view of the sky, an essential factor for ensuring a stable connection with minimal disruptions.
Next, Speed Tests were performed after installation to assess the system’s internet performance. It is important to note that Starlink may take up to 12 hours to optimize its connection, scanning the sky and optimizing satellite connections. Temporary speed fluctuations or brief dropouts can occur, but once stabilized, it ensures a reliable high-speed connection.
Call us at 1-844-799-0258 to schedule your Starlink installation or to address any service-related inquiries.
We also offer Starlink business installation and IT network services to nearby towns and cities including
and more, just ask.
DID YOU KNOW?
Oswego, Illinois is one of the fastest-growing communities in Kendall County. Once a small river town along the Fox River, Oswego has developed into a key residential and commercial hub while preserving its historic downtown. Its location near major transportation corridors supports steady population growth, modern infrastructure development, and expanding business activity, all while maintaining a strong small-town character.
Thank you for reading our Starlink installation articles.